The EP – From Demos to Completion

This blog post encompasses the journey of “Wait”, “What To Do”, “You and I” and “Role Model” – from their early demo stages to completion. The main musical elements are broken down into sections that cover the production techniques, approaches, and mix concepts utilised upon working with each musical element and song, alongside stating the producers that inspired my work.

Vocals

After having created the lyrics for my tracks, I wasn’t too sure on how I wanted the vocals to sound – whether I would want them sung without hesitation or whether I’d want them whispered/under my breath. With just the vocals alone, my voice was far too abrasive and sounded like I am singing from my throat as opposed to my diaphragm on “Wait” and “You and I”. However, whispered vocals on their own were too unintelligible and didn’t provide enough clarity to the vocal delivery. I decided that a mixture of the two styles on “Wait” and “You and I” would provide enough definition in the vocals to allow the listeners to understand what I am saying, yet the whispered style of vocal delivery would fit the overall feel and vibe of the song. I drew inspiration from Pulp’s ‘Common People’ and many of Beck’s songs that use a mixture of both soft soothing vocal performances alongside throat-driven vocal deliveries, such as ‘Wow’, ‘Devil’s Haircut’ and ‘E-Pro’ to name a few. As “Role Models” is the rawest, most organic sounding track out of the four I wanted the abrasiveness and harshness of my voice to cut through the mix, as whispered vocals would run the risk of disrupting the intelligibility of what I was saying.

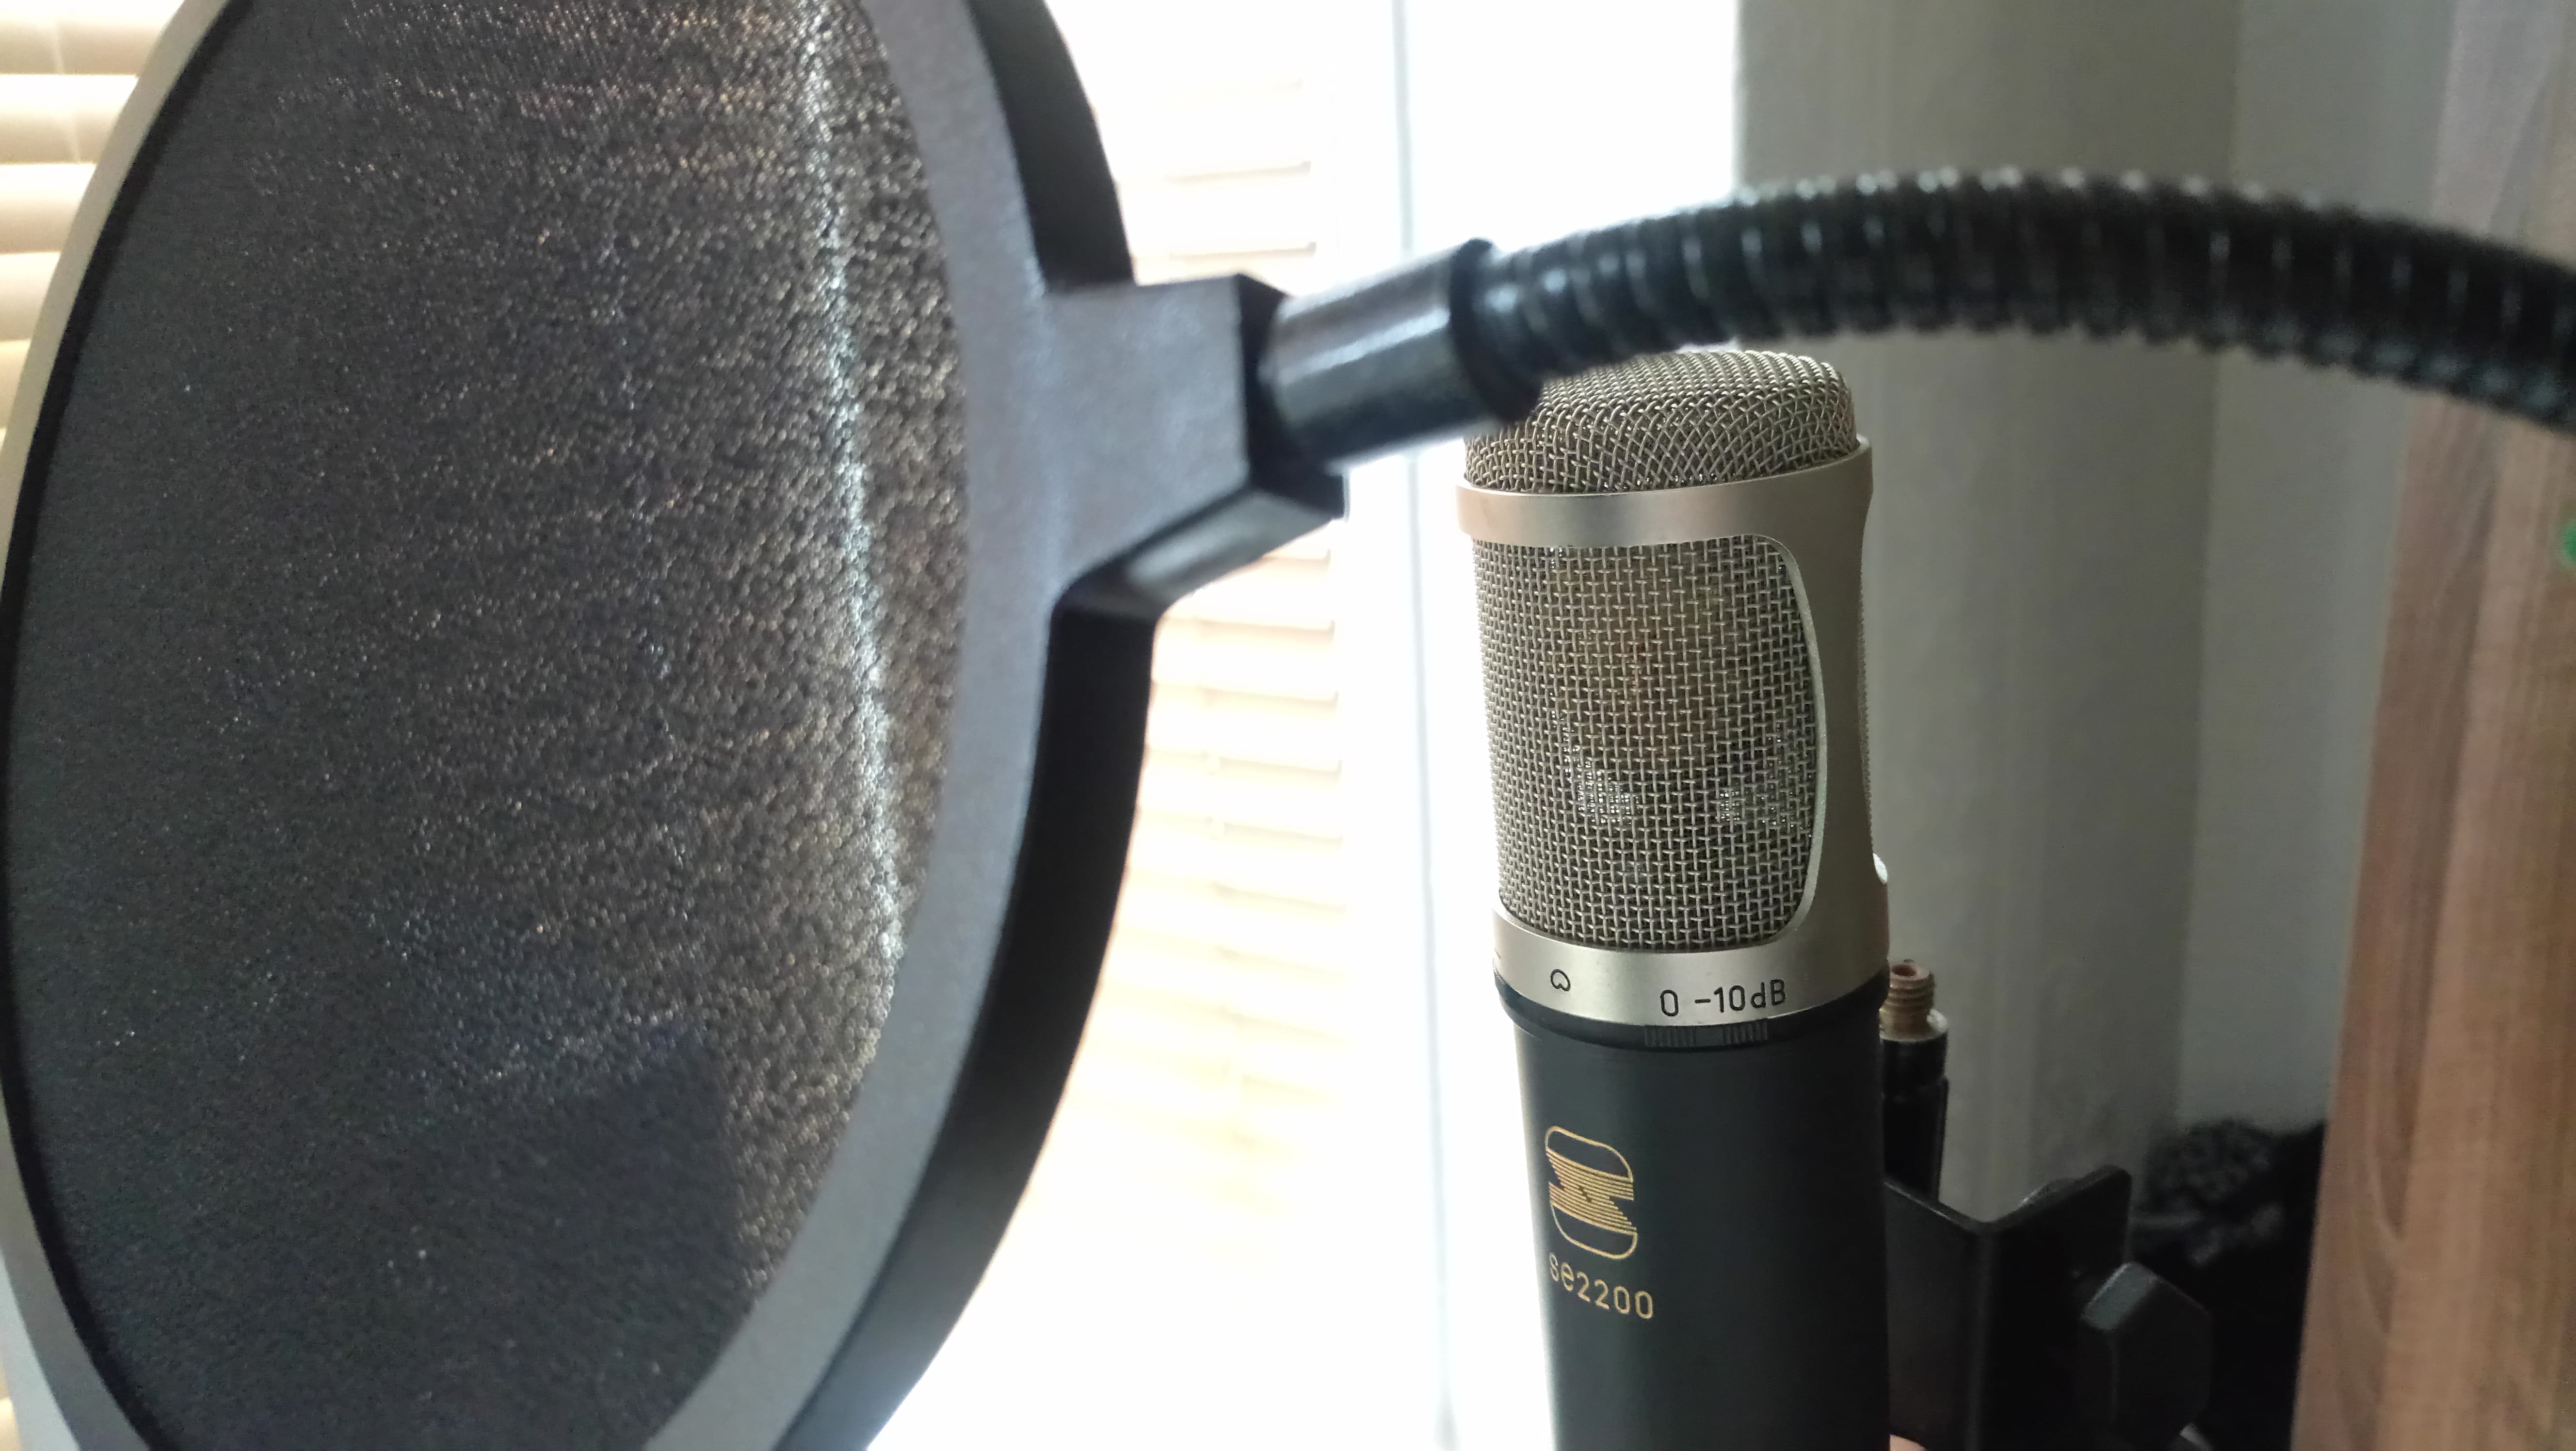
Prior to having made a decision on what I was going to do for this assignment, I had a ‘microphone shootout’ between the Electrovoice RE-20, AKG 414, sE 2200 II, AKG C4000, SM57 and Neumann U87. For my voice, the sE 2200 II didn’t dramatically attenuate the frequency range of my voice to an extent that it sounded different to how it sounds in the real world, however, it did have an audibly pleasurable way of changing the timbre of my voice between 7-10 kHz. The 414 and Neumann seemed to over-exaggerate the higher frequency range of my voice, which created a very undesirable, abrasive quality about it, so I opted for a microphone that captured the higher frequencies, yet slightly dampened how sharp they cut through when recorded.

I decided to record my vocals at home due to the ease of recording by myself and the amount of absorptive materials around the room that would help reduce reverb times by absorbing the penetrative properties of sound waves, especially the first reflection, which if not treated initially can create the issue of ‘hearing the space’ you’re recording in. I chose to use my own sE 2200, approximately 15cm away, using a pop filter to reduce plosives that could occur upon being so close to the microphone.

sE 2200 Vocal Microphone

The whispered elements are double-tracked and panned left and right slightly accordingly, to utilise the stereo field alongside creating an interesting effect that I believe has changed the feel of the song, heading towards more of a Pulp/Death in Vegas direction. The louder vocals, however, are double-tracked and centered, providing the definition and articulation that’s much needed alongside the whispered vocals.

Vocal Compression


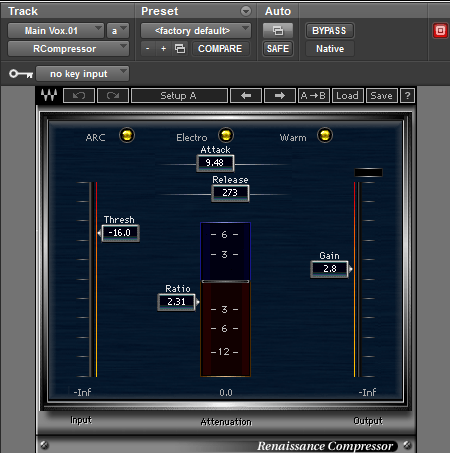
I chose to use the Waves Renaissance compressor to control the dynamic range of my vocals. Rather than using a ‘transparent’ compressor that doesn’t impose any audible characteristic to the timbre/frequency content of the sound source, I wanted a compressor that not only controls the dynamic range but thickens and creates a ‘beefy’ texture to the sound. I chose to go with a 2:1 compression ratio as I have previously had ratios up to 5:1; not only did it suck the life out of the vocal performance but also increased the audibility of the sound source exceeding the level of the compressor’s threshold over and over again, creating a ‘pumping’ effect. I chose a quick attack for tracks such as ‘Wait’ and ‘You and I’, as there are many words delivered over a short period of time, meaning I’d need the compressor to react quicker to the sound source exceeding the threshold than say for ‘What To Do’, where I take my time for the most part.

Vocal EQ

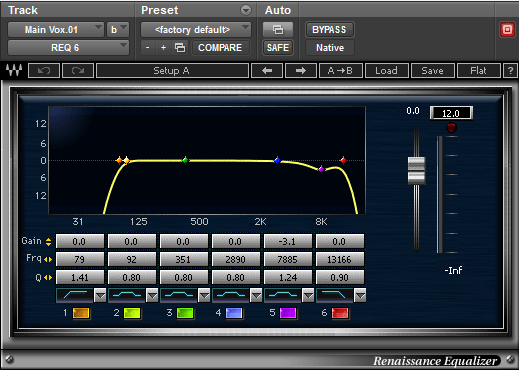
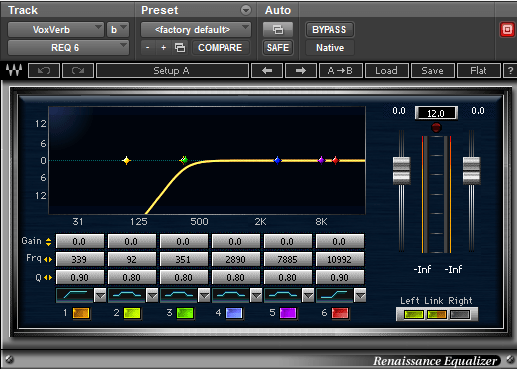
I used Waves’ Renaissance Equalizer for the vocals. Much like the Renaissance Compressor, this EQ doesn’t just boost/attenuate particular frequency bands but also imposes its audible harmonic characteristics onto the sound source it is applied to. I really like how it smoothed out the low-end frequency content of my voice even without boosting any frequencies, however, I did use a low shelf to remove <80 Hz as this wasn’t adding to the vocals and would only muddy the mix in an unnecessary way. The higher range frequency content was still a bit too bright for my liking and has been an issue with some of my vocal mixes in the past n my opinion, so I used a high shelf to remove frequencies 13.166 kHz and above and attenuate at 7.8 kHz by 3.1 dB, just to soften the abrasiveness of the vocals.

Vocal De-Esser

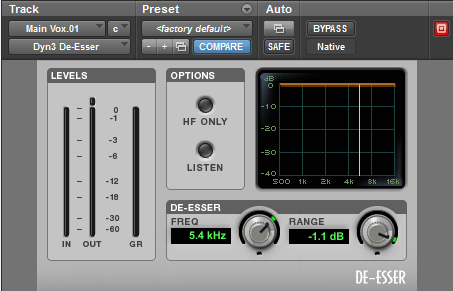
As there was quite a bit of sibilance in my voice, even after having chosen a suitable microphone and EQ’d, I decided to use a de-esser to control the ‘s” that were often over pronounced on purpose as a vocal style. Using the listen’ control, I listened to how the higher frequency content was being affected. I chose not to select the ‘HF Only’ as this option was attenuating sibilance far too aggressively and was very noticeable, thus I just raised the range control which acts as a threshold, to ensure that it was just capturing the sibilance.

Vocal Bus Tape Saturation Plugin

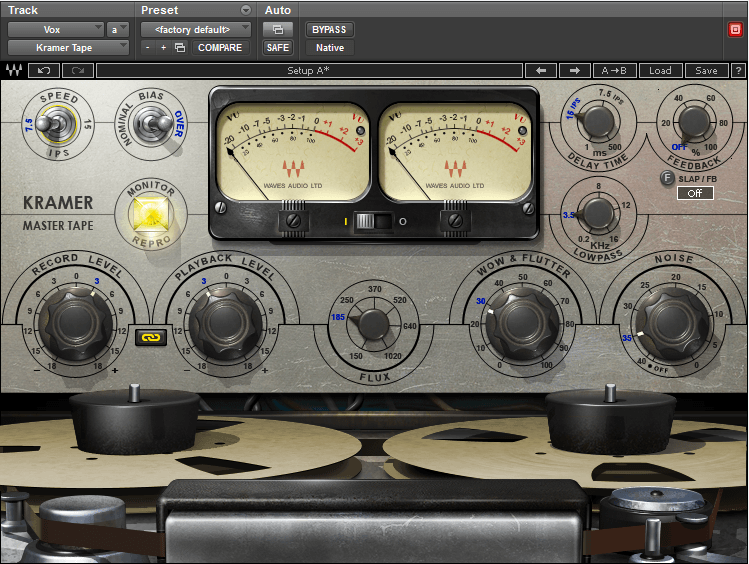
To add an analogue warmth, i.e. timbre change via harmonic manipulation, I decided to put the Waves ‘Kramer Master Tape’ plugin on the vocal bus. I changed the Inches Per Second (IPS) control to 7.5, as this thickened up in an audibly satisfying manner. I used the ‘Record Level’ control to drive the vocals into the tape emulator ‘hotter’, thus applying more tape saturation to the vocals which added a slight distortion that helped the vocals cut through the mix. I selected the ‘Link’ control between the ‘Record Level’ and ‘Playback Level’ controls to compensate for the volume increase.

Vocal Reverb

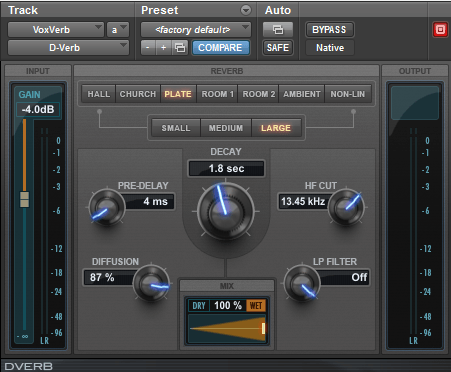
Pro Tools’ ‘Dverb’ reverb was used as a bus effect, allowing me to send my vocal bus to this effect. The large plate setting on a 1.8 second delay time seemed to be just enough to thicken up the vocals alongside making it sit well with the rest of the musical elements within the mix. I added a small amount of pre-delay to allow attack portion of the initial transients to cut through the mix, whilst the main bulk and tail of the sound source are being affected. I could have made the pre-delay slightly longer, but as my words are quite percussive in ‘Wait’, You and I’ and certain sections of ‘What To Do’, I felt making it shorter would help the reverb not ‘detach’ itself from the words I was saying.

Vocal Reverb EQ

I filtered the low end out of the reverb to ensure that the reverb doesn’t essentially leave a trail of muddiness throughout the mix. The reverb did not over-emphasis the higher range frequency content of my voice, so I didn’t need to attenuate/treat as it sat well within the mix.

Acoustic Guitar

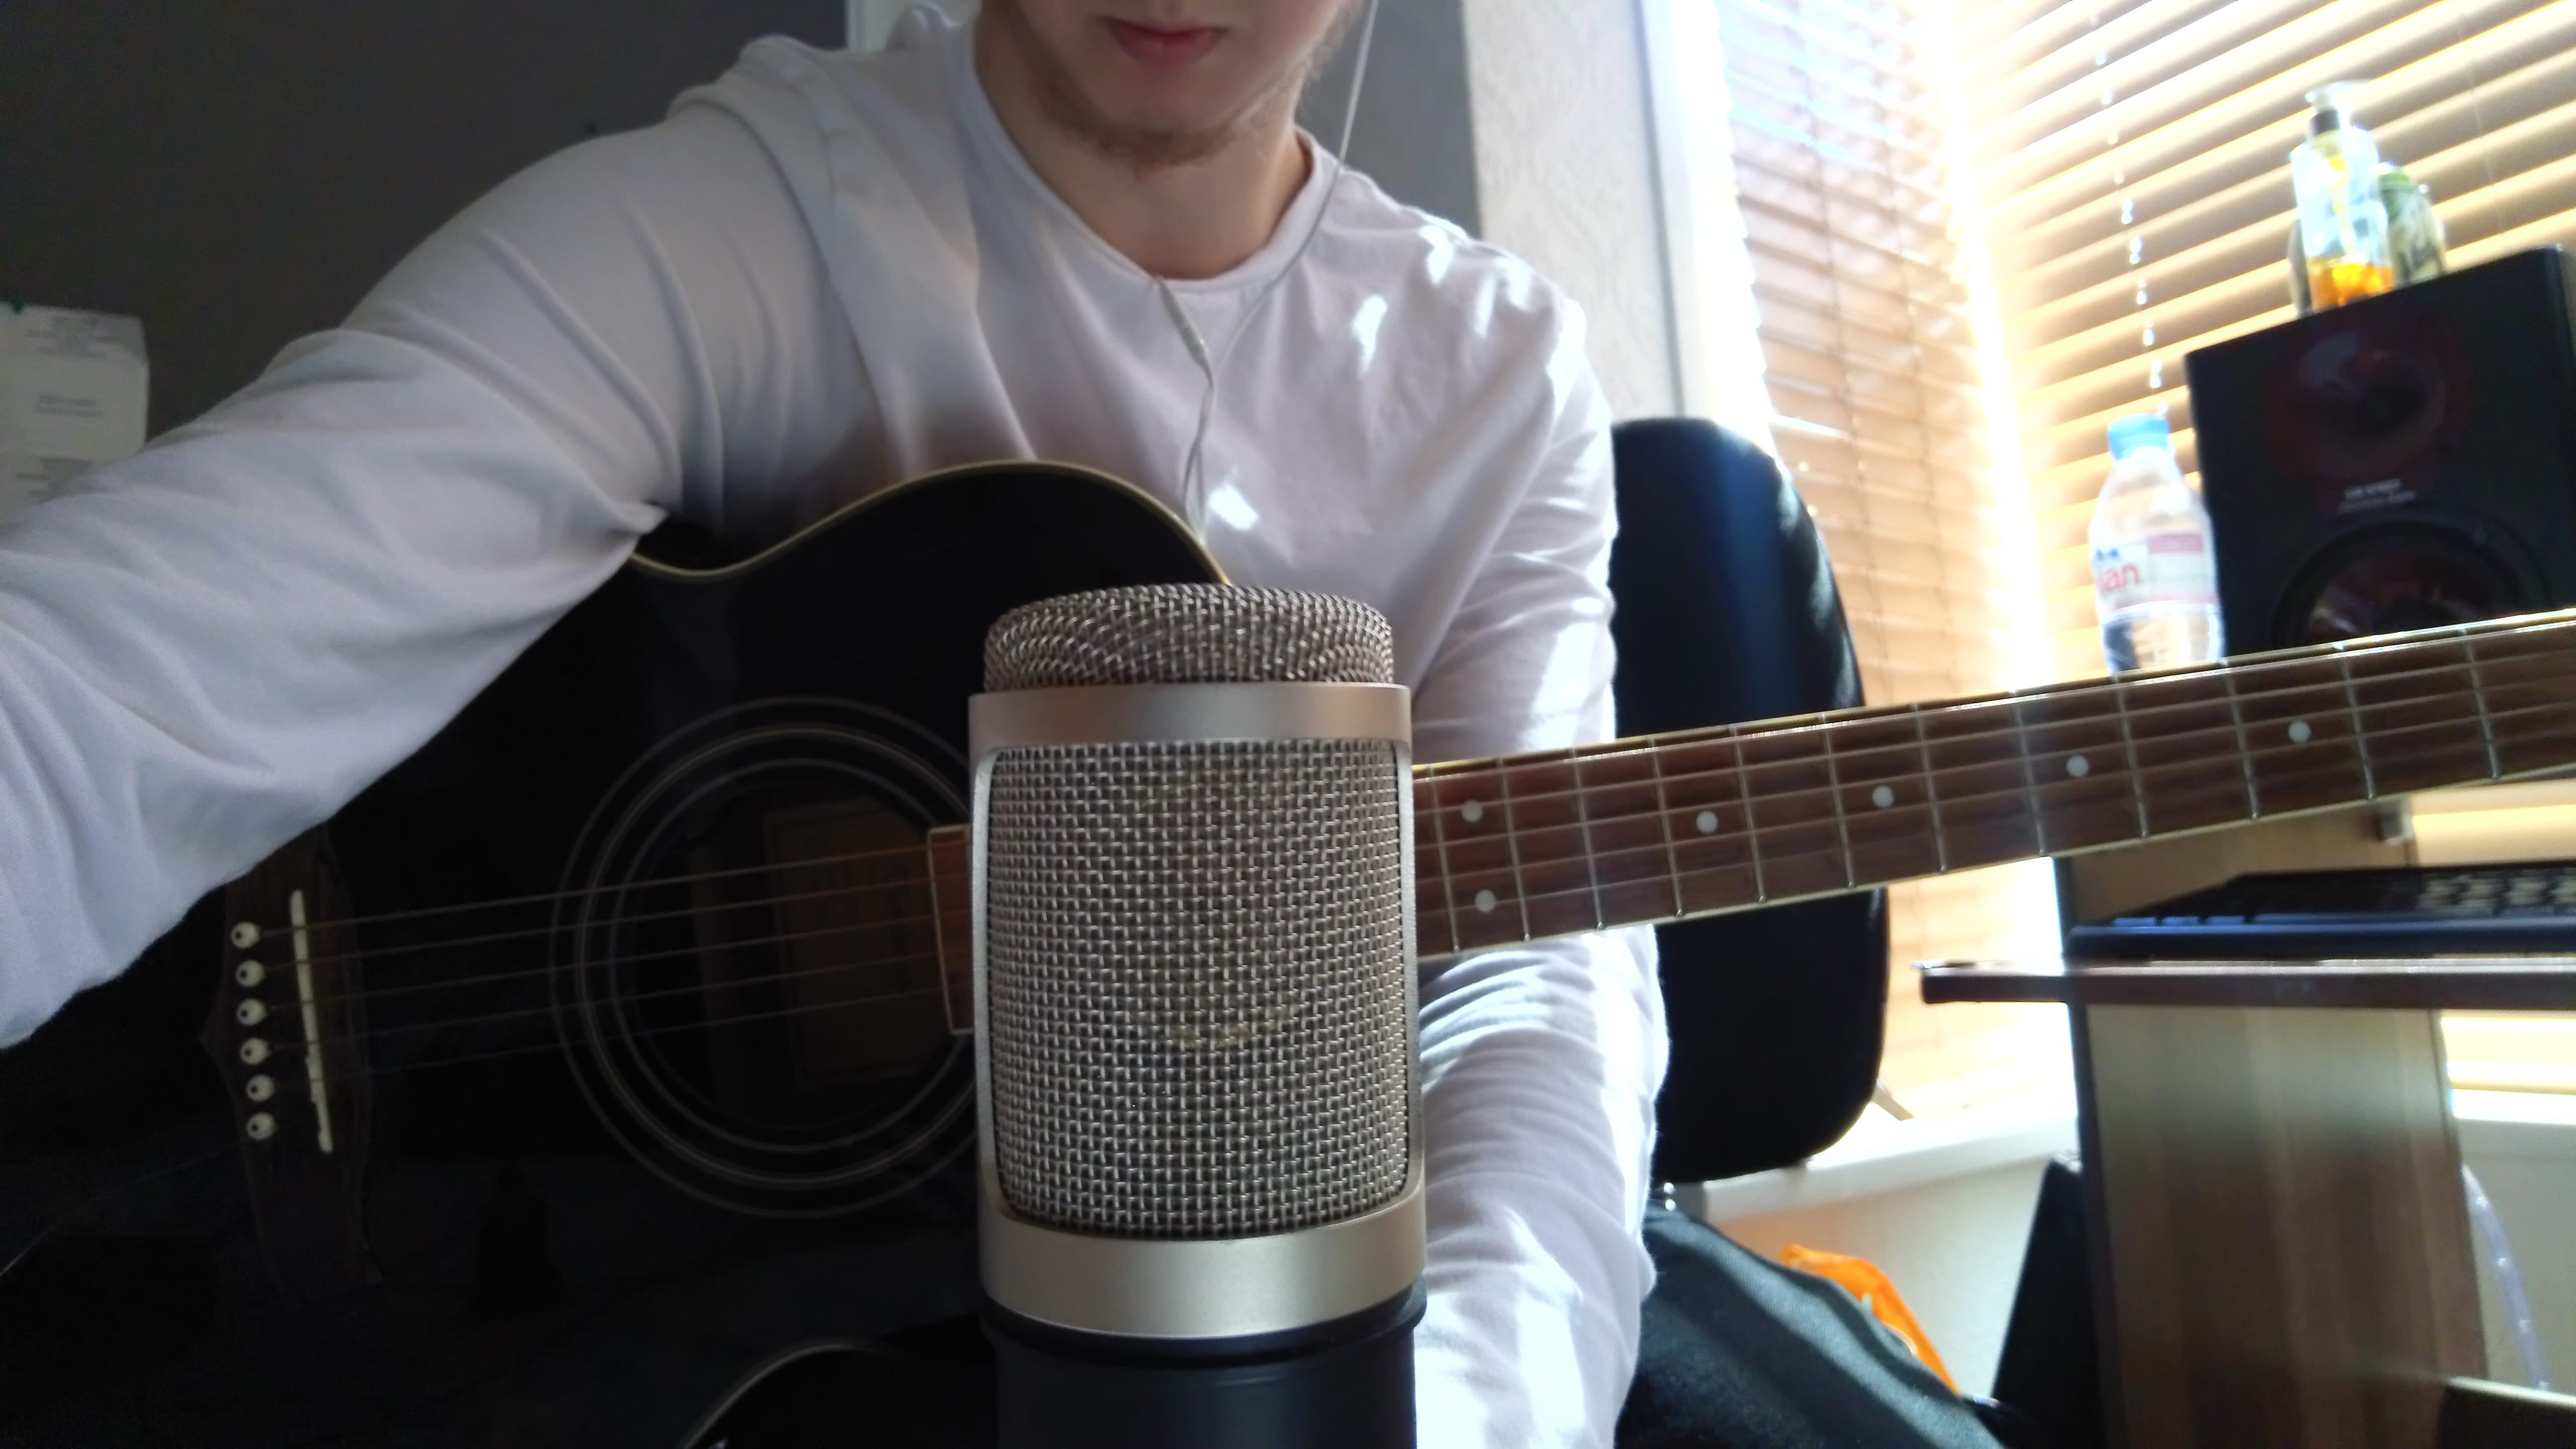
sE 2200 on the acoustic guitar

I decided to use my Tanglewood acoustic guitar for my tracks; the body has a smooth low-end frequency response alongside an open, jangly top end adding detail and articulation to rhythmic elements. After trying out both dynamic and condenser microphones, I decided to settle with using the sE 2200 condenser microphone, as it doesn’t attenuate the higher frequency content (which the SM57 and M201 did). The microphone was placed a metre and a half away from the guitar, aimed above where the fretboard meets the body, to capture an even amount of both low-end and high-end frequency content. For “Wait”, I moved the microphone slightly higher up the neck towards the 12th fret due to their being a wide array of musical elements, effectively the position change of the microphone acting as an EQ change. With “You and I”, I chose to back the microphone further back to capture more of the sound of the room and a more “raw, untreated, professional iPhone-like” recording. For me, this track ran the risk of becoming very polished, perfect and clinical, which is exactly what I didn’t want, so backing the microphone away, capturing how the acoustic guitar interacted within the environment and treating the vocals more in the polished, clinical sense made much more sense.

Electric Guitar

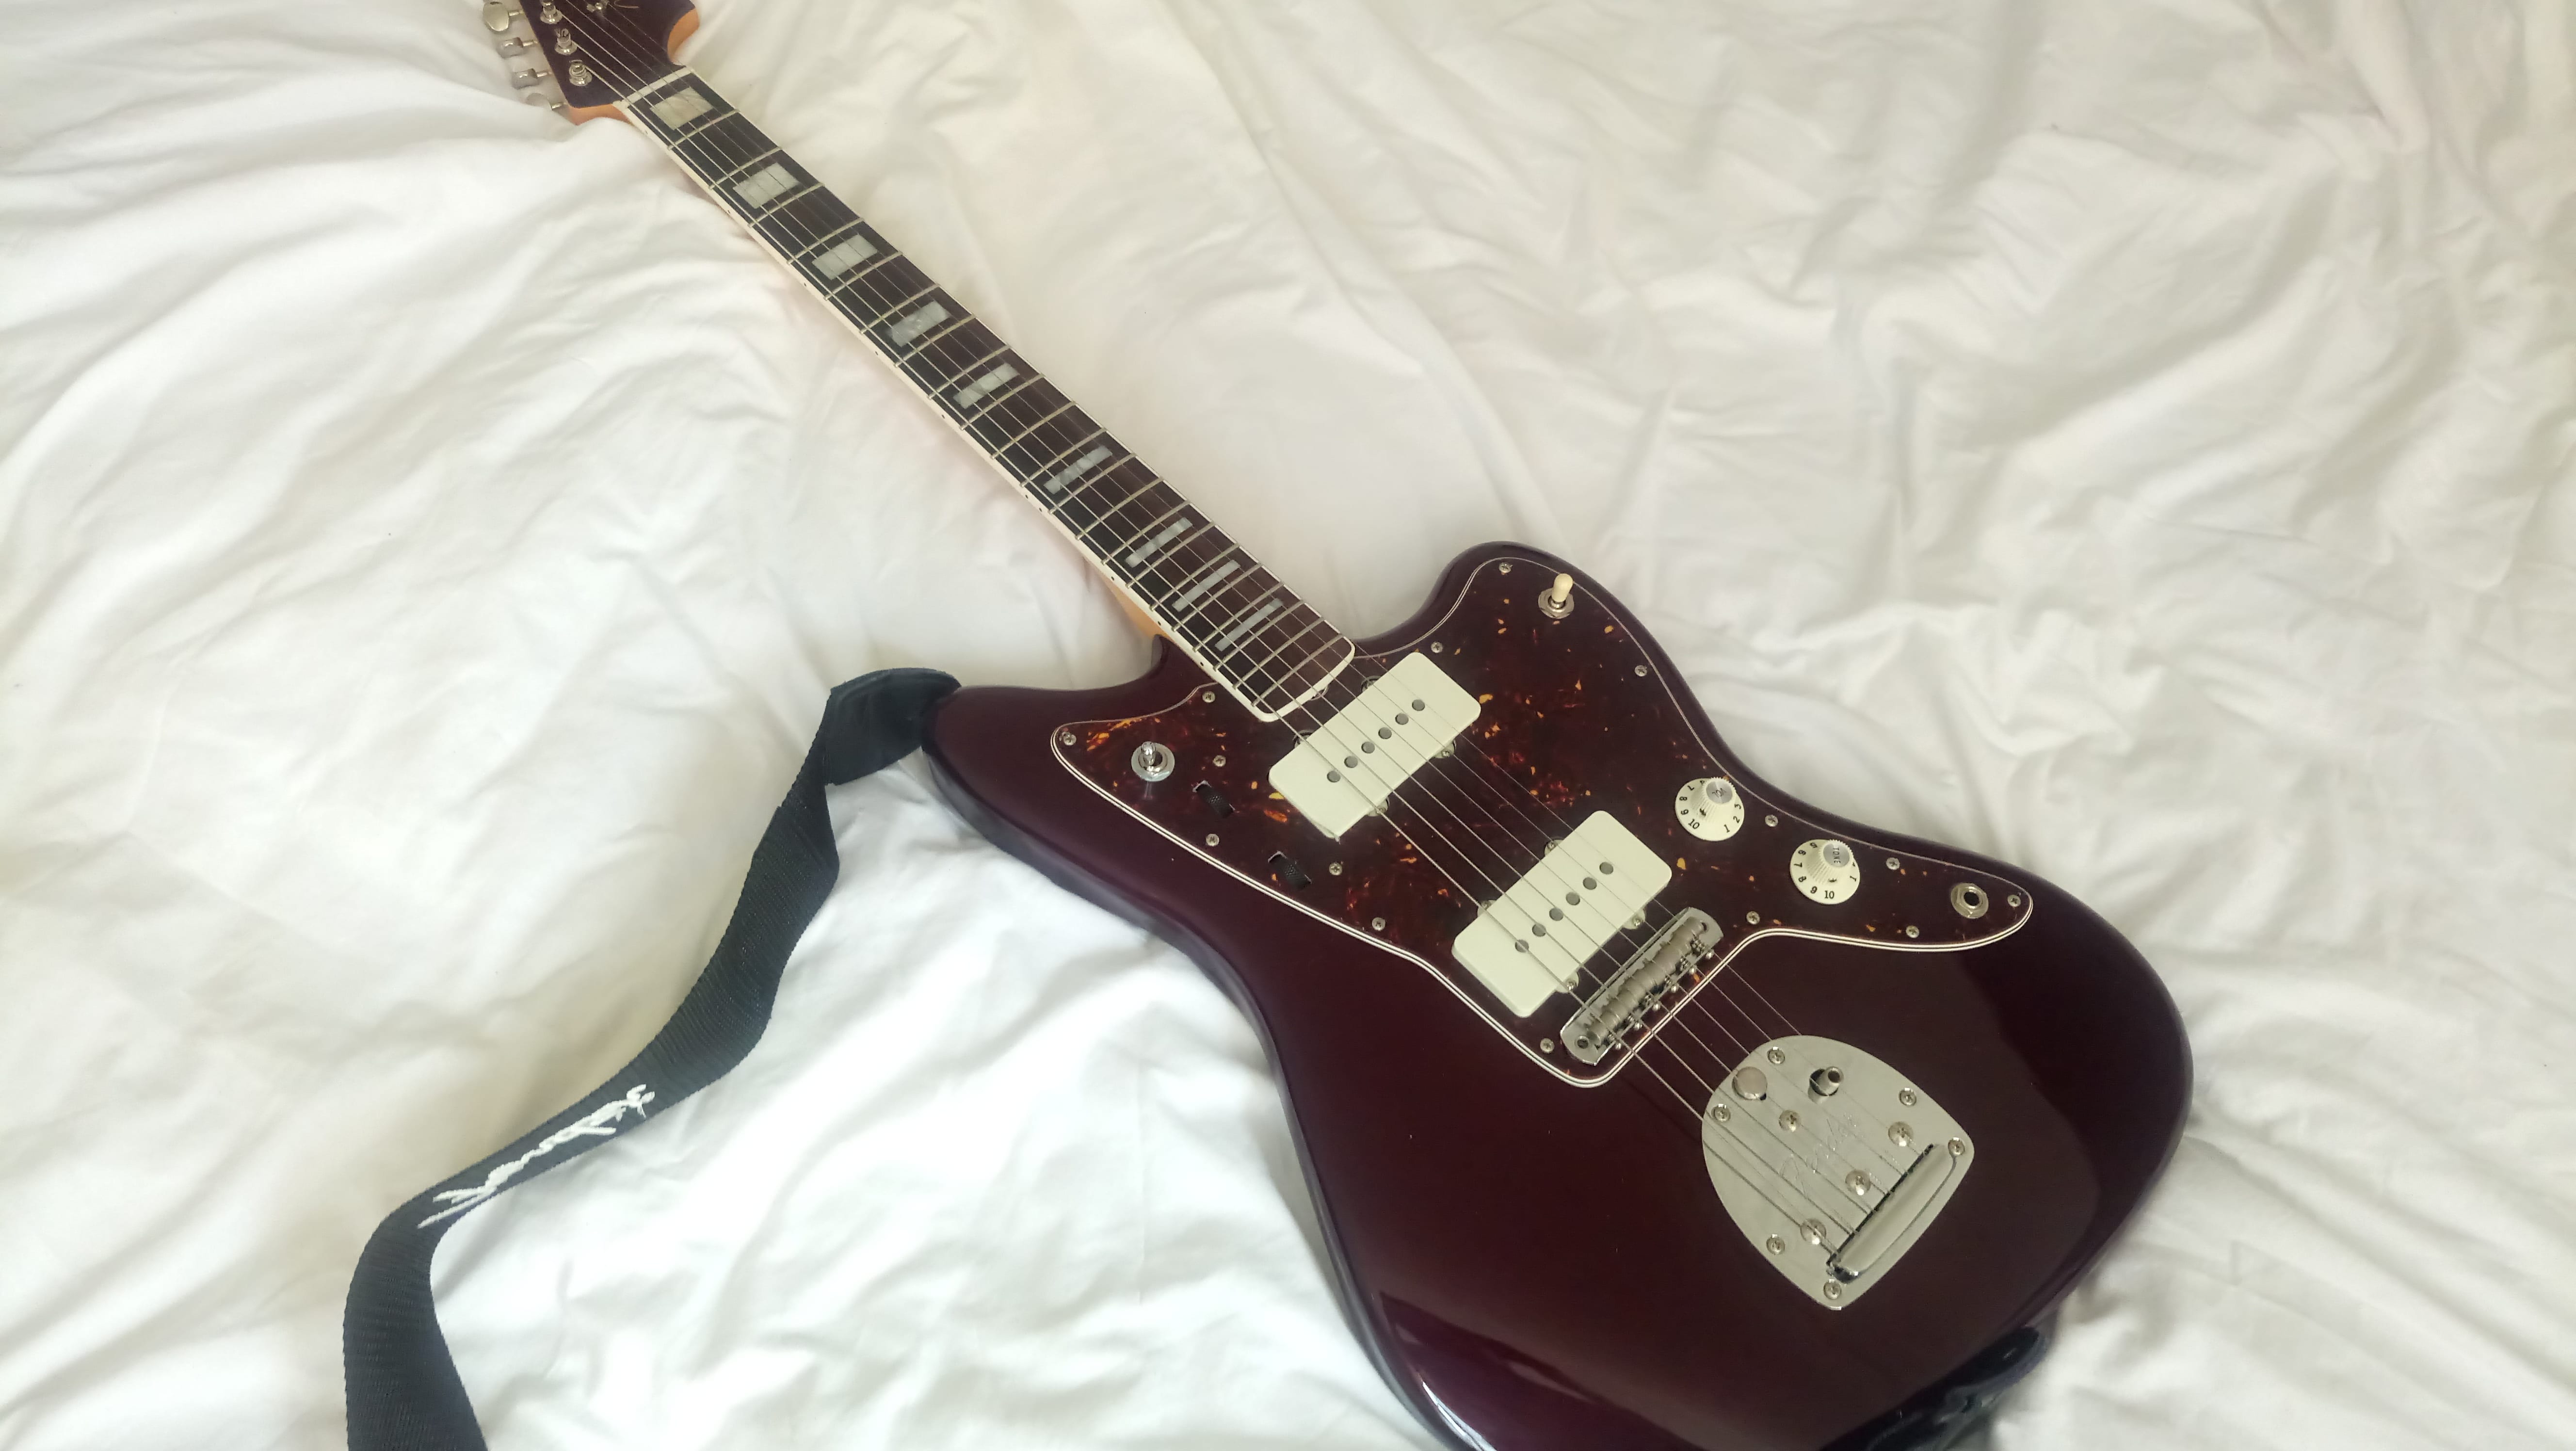
Fender Jazzmaster

When recording electric guitar, I wanted to make sure that wherever it was used it left an impact on the listener; either due to its delicacy, or it’s raw energy. For this reason, I used my Fender Jazzmaster; its rosewood neck helps reduce the abrasiveness typically found in Jazzmasters whilst still retaining a clarity, focus and definition in the higher frequencies.

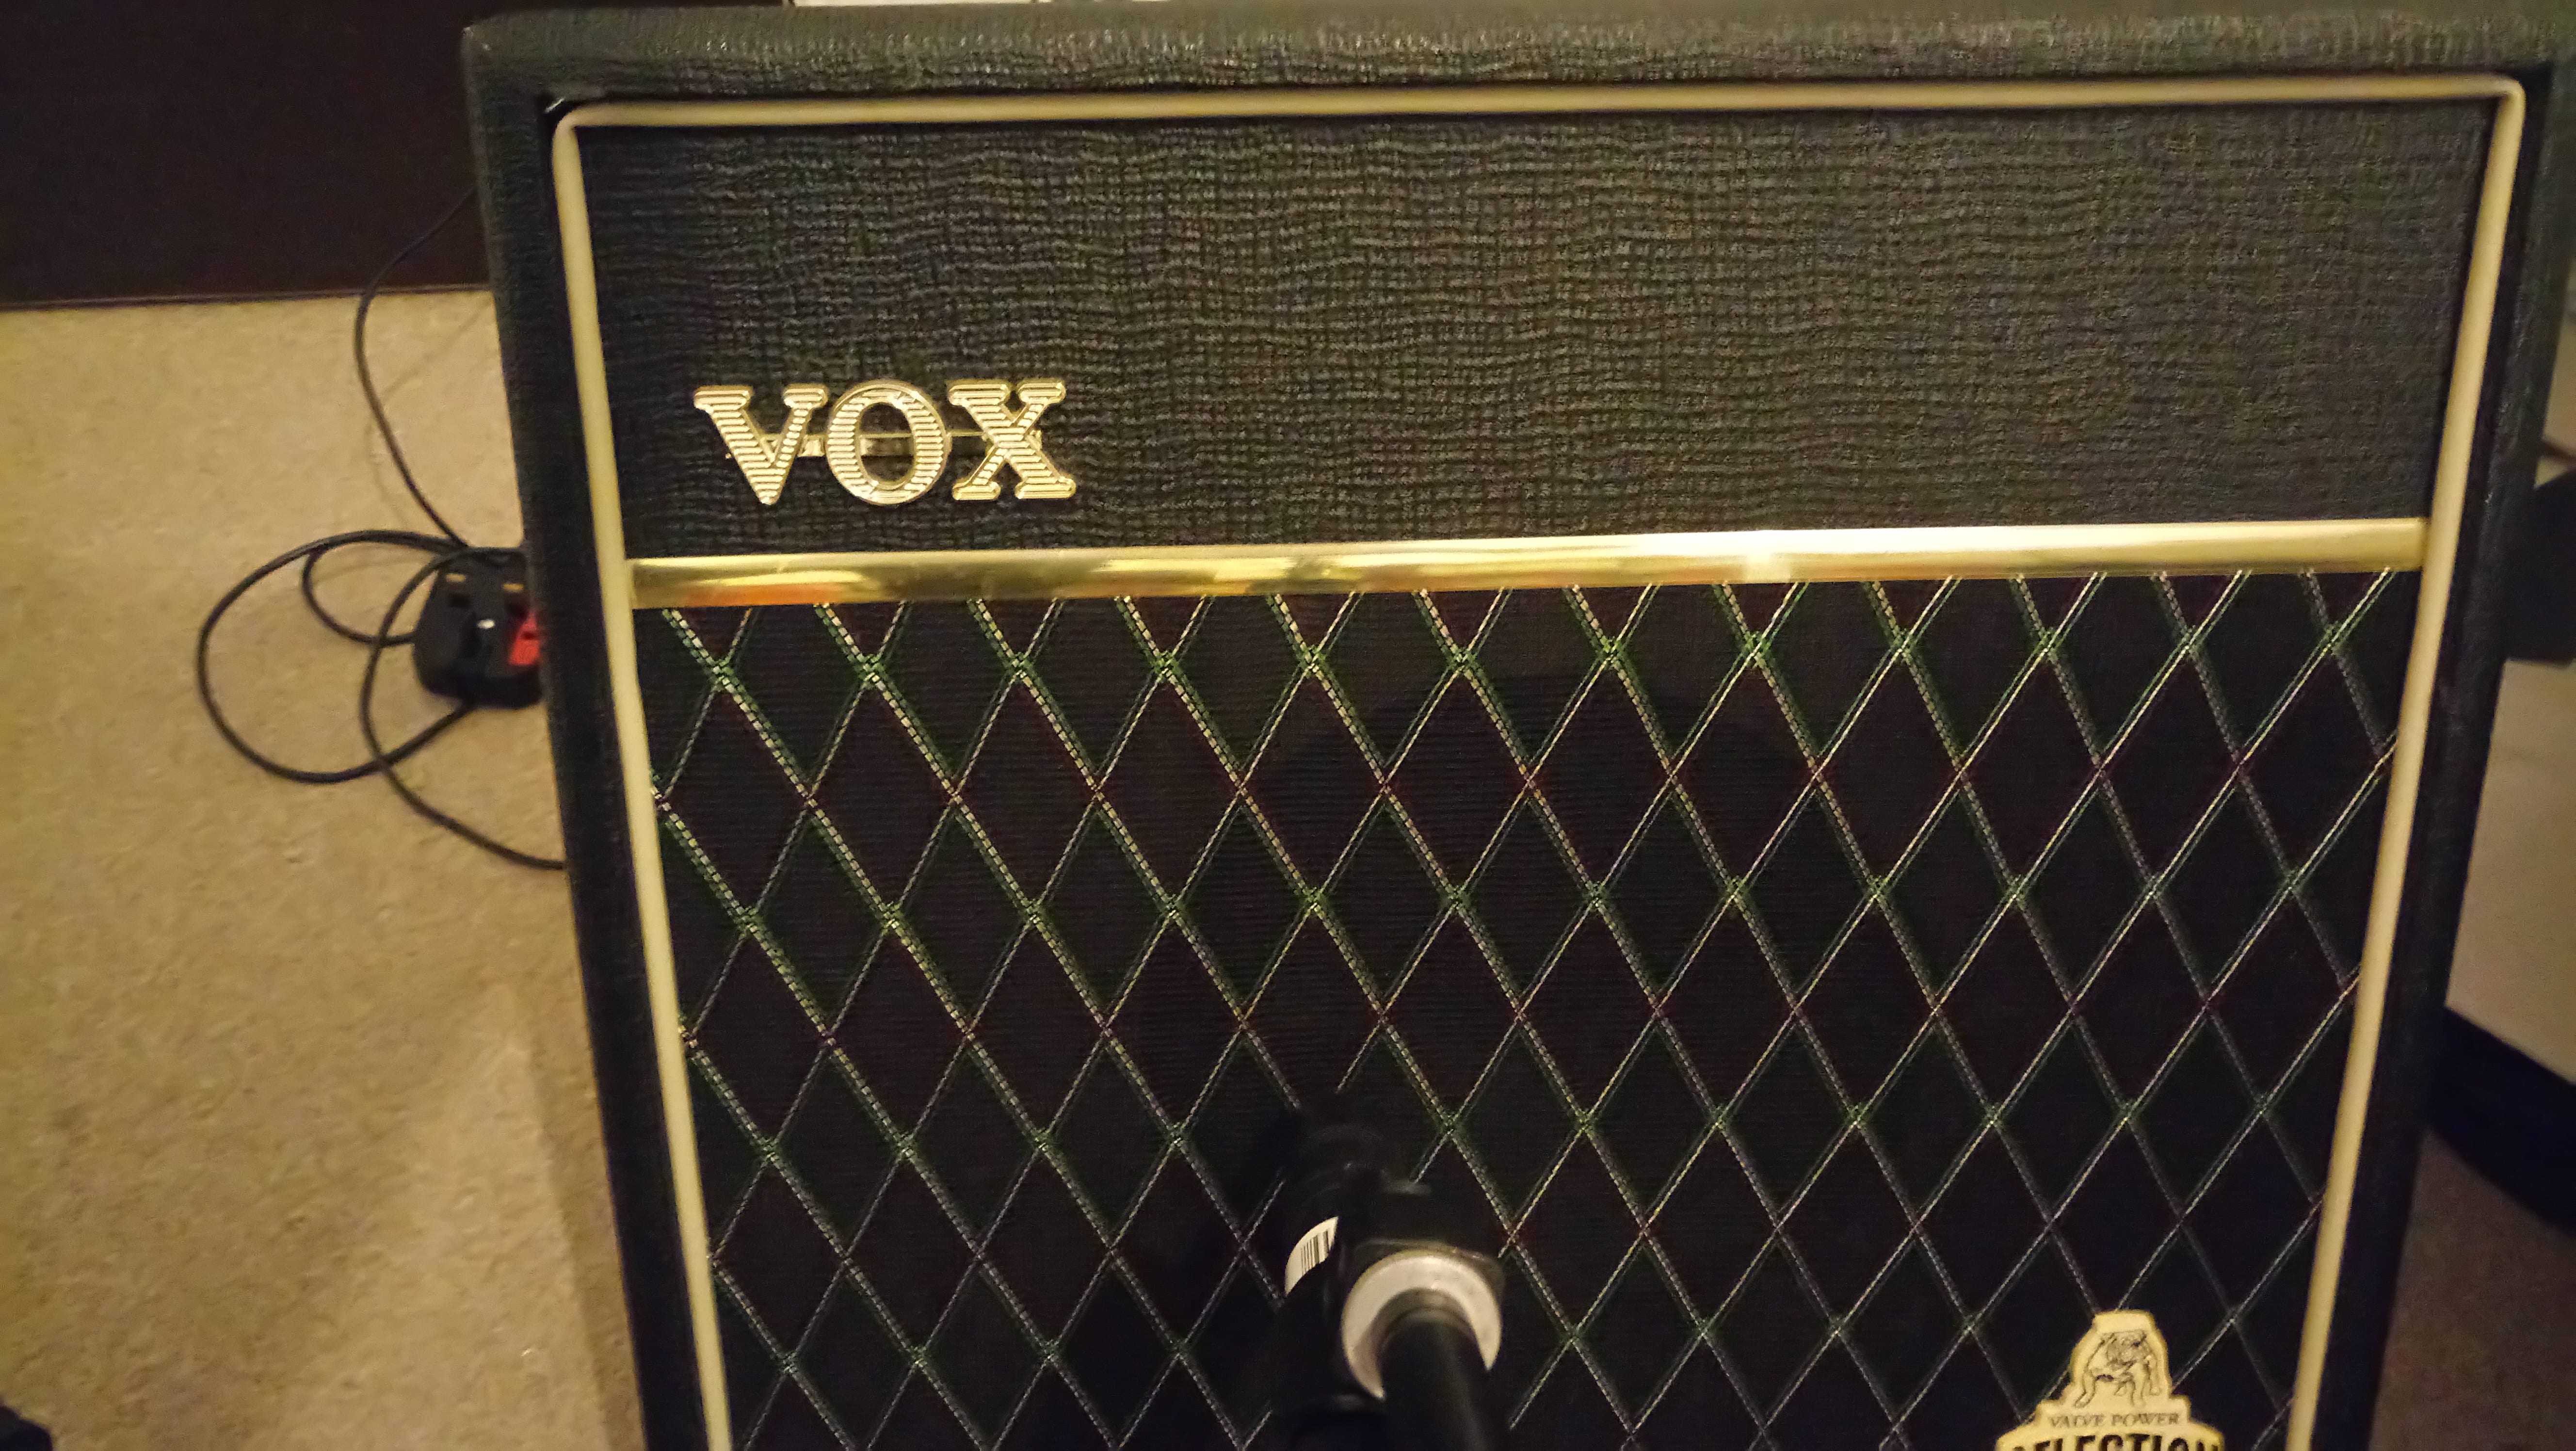
Beyerdynamic m201 on the Vox amp

I passed it through my Vox amp, using a high volume/low gain setting for the clean electric guitar verses of “Wait” and lead guitar sections of “What To Do”, and a low volume/high gain setting for the crunchy guitar choruses of “Wait”. The beyerdynamic m201 dynamic microphone was used to capture both tones, as it’s +4dB boost at 7 kHz helps exaggerate the clarity of the clean tones and the crunch of the distorted tone, which was exactly what I was looking for.

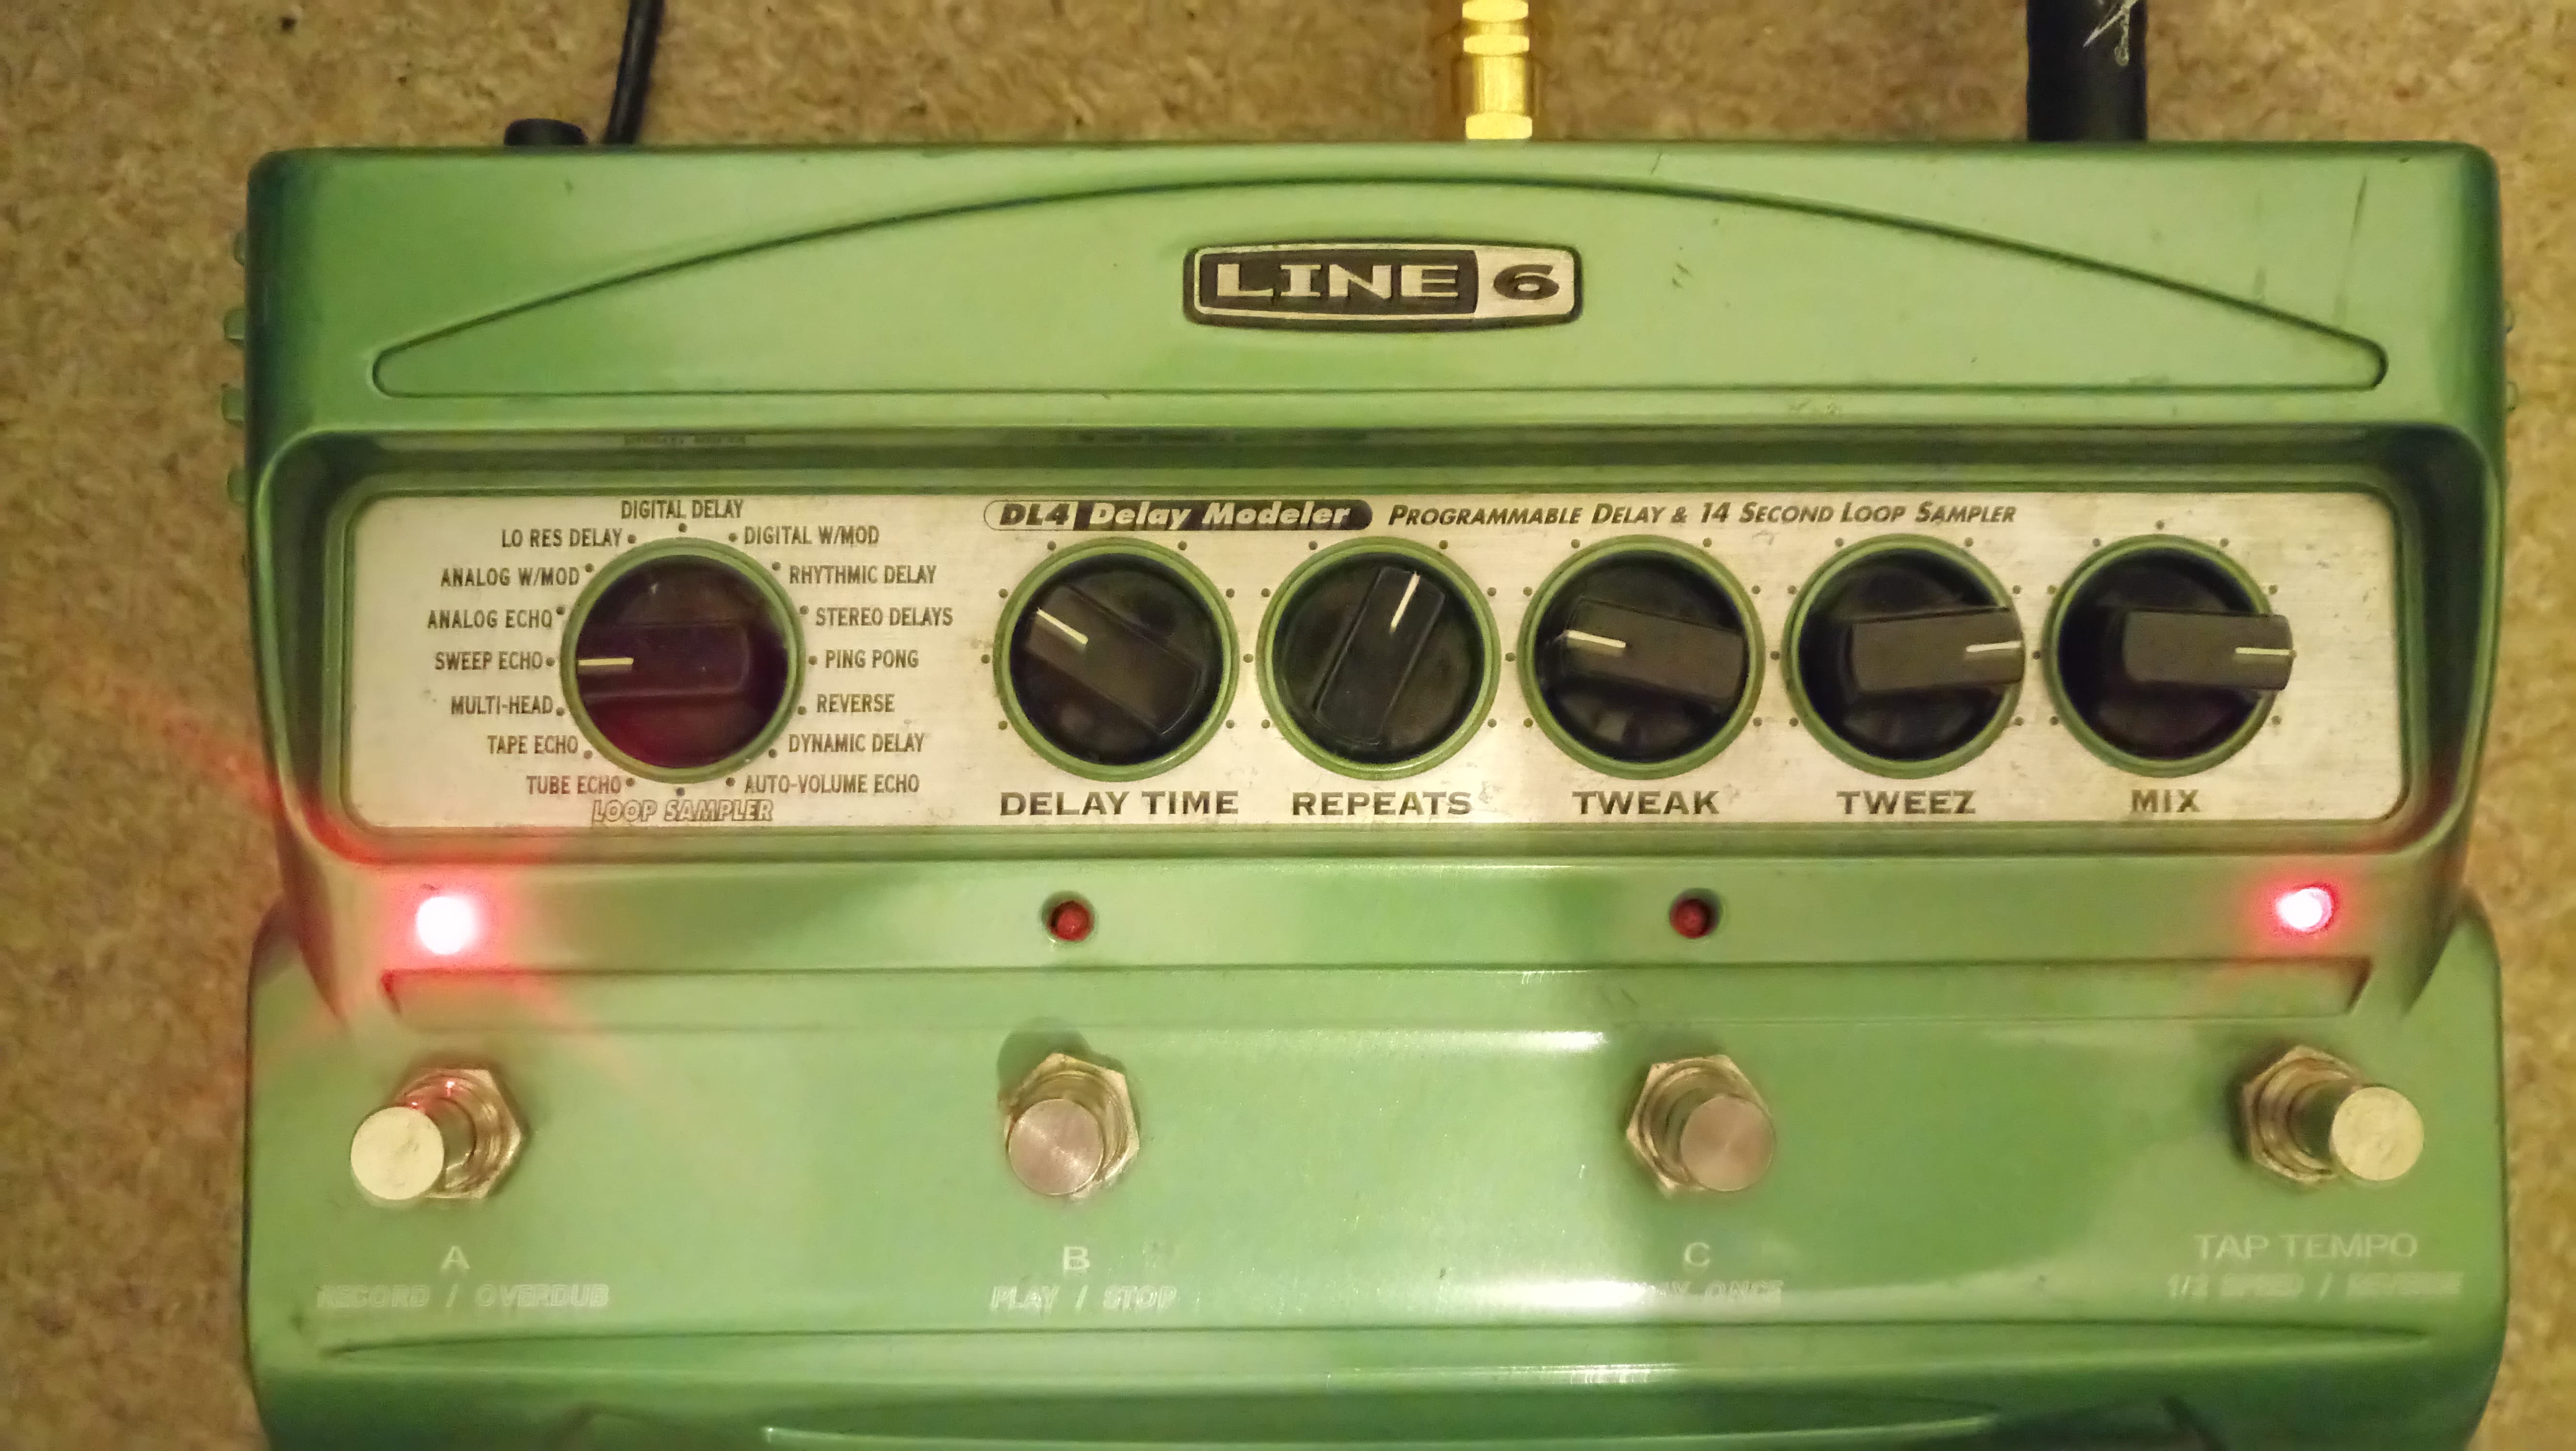
Line 6 DL-4

For some lead guitar parts in the breakdown of “Wait” I used my Line 6 DL-4 delay pedal on the setting ‘Sweep Echo’, which passes a resonant boost over the audible frequency spectrum, creating an effect that retains the interest of the listener.

Bass

I knew that prior to creating the bass I didn’t want anything that would distort the clarity or the rhythm of the acoustic guitar – I wanted it much more as a support tool. Upon working with Anthony (Sessions with Anthony #1), we bothagreed this is definitely the direction we wanted to take the bass, so we began playing around with some ideas.

We ran the bass through my RME Fireface 800, as we both felt that the bass could run the risk of becoming too overpowering in “Role Models”, “Wait” and “You and I”, which is much more about the vocal and acoustic guitar melodies.

Drums

Originally, during the verses I wanted to have rim shots, to signify a dying down of pace; however, during Pete Session 1, Pete played a different drum beat that was much more rhythmic and helped carry the groove and feeling of the song whilst still being fairly minimal in terms of its role.

Demos

https://soundcloud.com/parissounds/wait-demo

https://soundcloud.com/parissounds/what-to-do-demo

https://soundcloud.com/parissounds/you-and-i-demo
Reflective Summary

In this reflective summary, I am going to refer back to my individual project learning outcomes address whether the learning outcomes were met alongside exploring the successes and issues that arose during the project.

Addressing Learning Outcomes

To make it easier to refer back to the learning outcomes, I have provided them below:-

  • [LO1] Mix vocals better via implementation of industry-standard vocal mixing techniques
  • [LO2] Implement the production approaches of key record producers in my work
  • [LO3] Acquire guitar tone using analogue equipment prior to recording

Addressing LO1, there were a number of industry standard vocal mixing techniques implemented during the mixing process to ensure I was continuing to learn how to mix vocals in a more effective manner.

Firstly, I used a variety of compression techniques to control the dynamic range of the vocal takes used within the tracks. As covered in [From Demo to Completion] each individual vocal channel is compressed, EQ’d and is routed to either the ‘Main Vox’ bus or the ‘HarmVox’ bus (harmonies), where it is further compressed, EQ’d, tape saturated and is sent to a reverb bus.

Acquiring a better grasp of how different compressors treat the harmonic content of different the human voice in a variety of ways was important for me to understand, as I’d need to find one that’d be particularly.

Addressing LO2, I was inspired by many of the producers I had researched prior and during recording sessions, which led to me implementing many of their production approaches.

One of which was Steve Albini. Though he was not particularly in mind prior to the recording stages, as my tracks became ever more Rock/Alternative (‘Wait’ & ‘Role Models’), it became obvious that I should research how Albini approaches working with artists, how he treats instruments prior to and during the mixing process alongside many of his moral stances to acquire a better grasp of his production approaches.

The idea of “getting the most out of the equipment without making the equipment the focus of attention” (Tingen, 2005) really struck home with me, as all I wanted to do was capture what was in my head with the best method possible, by any means. Whether I was using a FET-styled compressor, an 1176 blue-stripe clone or Pro Tools’ own 7-band parametric EQ wasn’t the point – it would be best suited to make the record sound how it should sound. As Albini mentions in the SoS article, it comes with knowing your equipment, from how it manipulates the harmonic structure of the sound source to how you can use its controls in a variety of ways to get the sound you want. Therefore, I needed to understand and experiment how the compressors I had access to worked according to the sound sources I fed it.

Anton Newcombe’s production approaches were also an inspiration to the way I decided to tackle the recording process. His ‘do-it-yourself’ approach, inspired by Jesus & Mary Chain, pushed the idea of promoting expressionism through my music via the utilisation of the tools I have access to. This not only means the range of plugins I have installed on my computer but those on other’s computers, the spaces they work in, their skillsets, their instruments – their minds. Pete and Thomas [Sessions with Pete…] told me that my music was going very much in a Brian Jonestown Massacre route and recommended that I listen to their material. After having listened to ‘Their Satanic Majesties Second Request’ it became evident that I very much wanted to replicate the vibe they had created, which could be done in a multitude of ways. One of which was the inclusion of many real life ‘ethnic’ percussive elements – such as the Djembe, to which I decided purchases buy two different sizes of. Listening to ths album also reminded me that I had an egg shaker and tambourine, again, further adding to the psychedelic vibe of the track ‘What To Do’.

Nigel Godrich’s approach to working with people was an extremely important inspiration for me, as it gave me the confidence to understand how everyone is different when it comes to social interaction, working for someone and giving up their ‘ego’ for the greater cause. For example, upon recording Anthony it seemed he was quite nervous and on edge, despite us having an established 2-year relationship. Whether this was due to participating in a recording session, being in a rush from work or just in general feeling anxious, it became my responsibility to create an atmosphere he was comfortable with so that I’d be able to get the best performance out of him. I did this by offering him a drink, sitting down for a while and just catching up – just to take his mind off the recording session. When it came to discussing the kind of vibe I wanted for the track, I made it clear that I wanted his ‘take’ on the sound – his own little spin – otherwise, I could just do it myself. I wanted him to leave his mark and his ideas on the record. I believe this made him feel much more confident, relaxed and meant we both vibed off each other and created great ideas. When it came to making suggests to him, I made sure to suggest ideas as opposed to saying “no, this isn’t how it should be done”, it was more like “what about if you slided up to that fret?”, “oh wow, yeah that definitely suits the vibe of the song doesn’t it?”. Positive reinforcement alongside constructive criticism meant we enjoy working together and meant our relationship in the musical sense was successful in terms of being on a similar creative wavelength. This is really what I got from Nigel Godrich – not necessarily the way he works with technology, but more about establishing relationships and communicating with creative minds.

Addressing LO3, as covered in [oasjoisjdisojdosd], I used a few different ways to alter the sound of the guitar during the recording stage.Firstly, I had to decide what kind of tone I was wanting, this being a crunchy distortion that I wanted to get from my Vox amplifier. I knew that I wanted to use my Fender Jazzmaster, as the edition I have uses rosewood for the fretboard which gives a darker, less jangly sound than most Jazzmasters. Pairing this the vox amp would thus create a lovely mid-range crunch that I was looking for to create a shoegaze/ambient rock/film-like feel.

Firstly, I had to decide what kind of tone I was wanting, this being a crunchy distortion that I wanted to get from my Vox amplifier. I knew that I wanted to use my Fender Jazzmaster, as the edition I have uses rosewood for the fretboard which gives a darker, less jangly sound than most Jazzmasters. Pairing this the vox amp would thus create a lovely mid-range crunch that I was looking for to create a shoegaze/ambient rock/film-like feel. I then decided to capture the sound with a Beyerdynamic M201 – a microphone I had used back in 2012 to get one of the greatest distorted guitar sounds I had ever recorded. I knew that it’d exaggerate the crunch of the distortion in the 2-5 kHz frequency bands, so it made sense to record with this microphone. For clean tones, such as the verse rhythm guitars in ‘Wait’ or the lead guitar parts in ‘What To Do’ all I’d have to do is back the gain control from the 12 o clock position to around 8 o clock and move the volume control to around 11 o clock to compensate for the reduction in volume. I wouldn’t need to change any of the EQ options on the amp as the guitar treble control was set to a level that wouldn’t over-exaggerate the higher frequencies so that they’re too abrasive but wouldn’t also attenuate the clarty of the high-frequency bands.

When it came to effects I would use, I decided to use my Line 6 DL-4 on the Sweep Echo settings, which is a modulation effect that ‘sweeps’ through the frequency spectrum with a resonance boost to over-emphasis the frequencies it passes through. I used a short delay time to create a ‘wall of sound’ with a medium feedback delay setting so it lasts a substantial time but not too long that it becomes muddy.

Successes/Problems Within Role

Starting with successes, I’m pleased with how I was able to adapt as a producer when it came to working with many of the individuals I collaborated with. With Pete and Thomas, I ensured that I listened to everything that they had to say; from advice, suggestions, recommendations, creative tips, alongside helping to provide advice to them on how to approach the music we were making. I felt that I learned how to communicate ideas across in a much more usable way – rather than just saying how I’m imagining it done, working together with whomever I’m collaborating with to create something greater than the sum of two parts. I’m satisfied with how I was able to ease the minds I was working with into recording/creative settings, so that not only would I be able to get the best performances out of them, but we also had a fun time doing so. Many of us had great conversations about leadership, communication and how people function in social settings, which not only made us closer together as friends and creative minds alike, but meant we were engaging in the exchange of thoughts, which means a lot to me.

With regards to problems within my role, one of which was managing collaboration. Pete (drummer) is a 40-year-old, full-time working, single father of two, which meant that not only am I not one of the priorities in his life but also meant that we couldn’t collaborate as frequently as we could have if say we lived permanently in the same city. However, there were only one or two instances where we had to reschedule – he was extremely flexible and was willing to help in any way I asked. However, Pete happened to catch pneumonia a few days prior to our recording session, which meant that we couldn’t pursue as expected. My first instincts were to let Anthony know not to come down and to contact the other drummers I had contacted back in the first few weeks of the assessment. I contacted a close friend called Ross, who said he’d be more than willing to record drums for me when he next made it down to Nottingham – however, we were unable to get a response from our old college to book some dates in the studios. I thus looked into different way alternative artists work with using a mixture of acoustic instruments and electronic instruments such as Gorillaz, Death in Vegas, The Kills and Kasabian. From this research, I concluded that I should use the drum demos we had recorded and treated them in a lo-fi, distorted yet powerful way to reinforce the rock-like feel I was going for with ‘Role Models’ and ‘Wait’. Looking back, I feel like this was the right move to make, as I could have perhaps moved to MIDI drums, where there could have been the potential for there to be a lack of rhythm, pace, energy and feel, so using our previous drum takes was a much more sensible option I feel.

References

Paul Tingen (2005) Steve Albini: Sound Engineer Extraordinaire. [online] Sound on Sound. Available from: http://www.soundonsound.com/people/steve-albini [Accessed 26 April 2017].


April 2nd Recording Session – *CANCELLED*

The recording session organised for the 2nd April had to be cancelled due to health complications with Pete that could see him out for a long time.

After hearing this news, I began straight away looking for other drummers that I’m familiar with, as there would be a built chemistry between us, allowing us to be on the same page as well as speed up the time it would take to set up a recording session.

I reached out for a good friend Ross who I’ve known for years and studied with, who has connections with I’m Not From London and NCN, to which I suggested we contact NCN, as the chances of acquiring studio time would be much greater due to there not being as much commercial demands.

Current State: Right now we are in the process of negotiating where we’ll try to record and when – right now it seems like NCN around 7th April – this will be updated as more information is clarified.

David Meeting – Week 10 (31/03/17)

This week’s meeting was orientated around the preparation process – making sure everything is in place so that the weekend’s recording session would run smoothly. This involved communicating with all appropriate parties to ensure they know what they are playing, when to arrive at the studio, when we’d take breaks and when we’d be finish by. I expressed to David that this was a key area I wished to develop; having the ability to be thoroughly organised when it comes to collaborating with individuals and groups, so that everyone is up to date with all of the relevant information.

David expressed the importance of booking time in the studio for trying out the external hardware, allowing me to interact and get a feel of how they work prior to the recording process, ensuring a fluidity when it comes to my workflow on the day of recording.

By the next recording session, I wanted to present the edited drum and bass recordings.

Acoustic Guitar/Electric Guitar – Production Techniques

The following blog post is going to cover a range of different acoustic and electric guitar production techniques suggested by a variety of recording/mixing engineers.


Acoustic Guitar

Graham Cochrane, the brains behind TheRecordingRevolution.com, is a recording engineer that has came to fruition due to his valuable knowledge around the recording and mixing process. In a video he made pertaining recording the performance of an acoustic guitar, he discussed the varying ways a microphone can be placed in front of a guitar so to capture its sound in the way you intended. He suggests by backing the microphone away from the acoustic guitar to around 1 foot and aiming the microphone around the 12th fret, you’ll capture an even frequency response of the guitar, meaning the low end frequency content isn’t going to have to be reduced via EQ and the but also there is enough higher frequency content to ensure the guitar doesn’t sound too dull. However, he does state that it’s about understanding how the guitar fits within the framework of the song [0:10-2:55]; an overly thin-sounding guitar might be perfect as a “texture piece” – working alongside a variety of other musical instances – it just depends what you feel the song is requesting from the musical instruments

He also is using a large diaphragm condenser microphone (LDC) microphone.

Electric Guitar

http://www.soundonsound.com/techniques/guitar-amp-recording


References

RecordingRevolution (2016) Recording Acoustic Guitar (My Foolproof Method) – TheRecordingRevolution.com. [online video] YouTube. Available from https://www.youtube.com/watch?v=cZRnrA5GOx0 [Accessed 16 March 2017].